Troubleshooting
Troubleshooting camera connectivity
Use this section to solve OS-specific configuration issues in more complex networking scenarios.
Setting up multiple camera hubs under single Ubuntu host
These instructions can be used under a Desktop install Ubuntu 18.04 (Bionic) or 20.04 (Focal), which uses network-manager by default to manage the systemd network overlay. Note that "Server" installations of Ubuntu needs to be configured instead through netplan.
This configures your Ubuntu host as a gateway / router. If you use a separate standalone gateway / router, do not use these instructions.
For sub-1Gbps data rates (see reference table for approximate data rates), these instructions are not needed and a single gigabit router can accomodate the datarate of all streaming cameras.
As camera data rates approach or exceed 1Gbps, multiple network interfaces must be used. You can use multiple gigabit-USB ethernet adapters, or multiple PCIe gigabit ethernet adapters for each e3Vision camera hub.
When direct-connecting multiple camera hubs to a Linux host system, automated link-local routing table forms one giant block (169.254.*/16) and only the first network interface (lowest metric) is reachable. So we need set up individual separate DHCP “Shared” blocks on each interface.
-
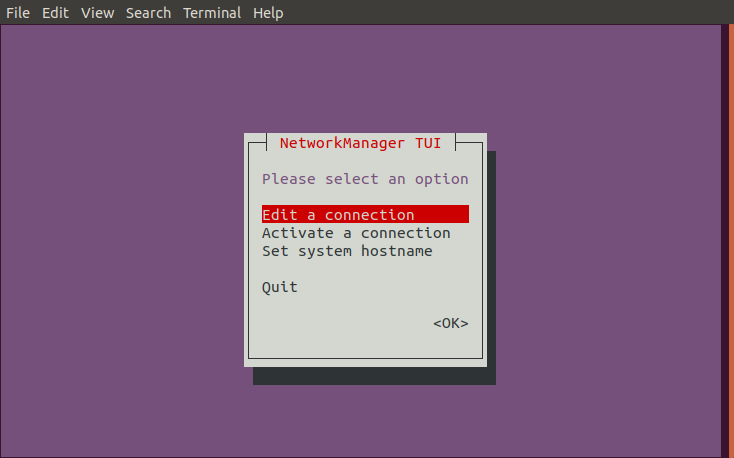
Open a terminal and launch the ncurses-based network connection manager,
nmtui(this was tested to be much less buggy than the GUI-based configurator in Settings, which didn’t apply these settings properly, especially under Ubuntu 18.04)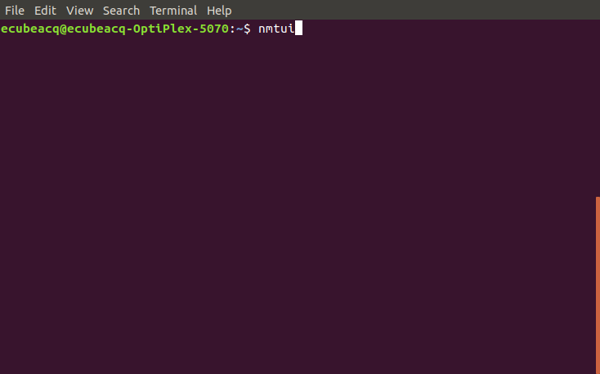
-
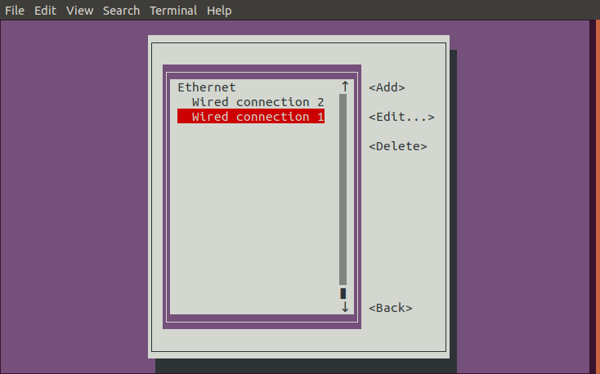
Use arrow keys ↑↓←→ to select “Edit a connection” and press Enter.

-
Select an interface connected directly to an e3Vision camera hub. If not sure which is which, you may have to cross-check with the device name listed in the next step, and use Esc key to come back. (Do not select host system’s upstream internet connection or Wifi hotspot connection. If selected accidentally, return using the Esc key.)
-
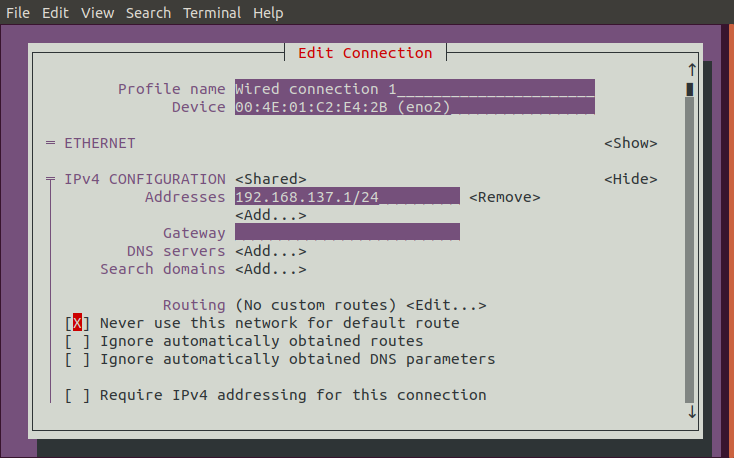
Use arrow keys ↑↓←→ to select the mode selector after
IPv4 CONFIGURATION<Mode>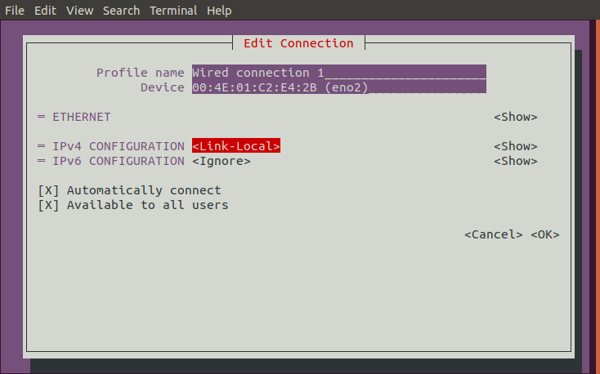
-
Change the mode to
<Shared>from the previous state (which was likely to have been<Automatic>or<Link-Local>)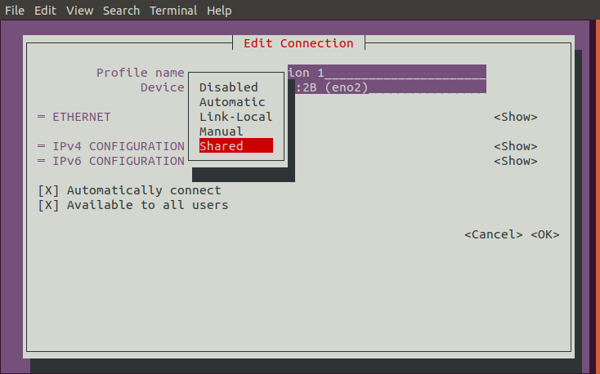
-
Expand the
<Show>option afterIPv4 CONFIGURATION -
Go to the
<Add...>option after Addresses -
In the
Addresses->Add...box, enter a desired LAN IP address block, which should be something in192.168.x.x,10.x.x.x, or172.16./12. More detailed examples below:
In this example we're using 192.168.137.1/24, but any distinct subnet will do.
For example, a possible set of configurations that’s easy to remember could be:
- Set up
Addressesas10.100.1.1/24in this dialogue. - When you repeat this process for the next interfaces, add in their respective
Addresses->Add...box: (one only, per network interface)10.100.2.1/2410.100.3.1/2410.100.4.1/24- … additional interfaces…
- Set up
-
Move down and check the checkbox next to
Never use this network for default routeusing [Spacebar].
Remember to exclude this directly connected, link-scope hop from the default route by checking the checkbox.
-
Arrow key to scroll down to the bottom and press [Enter] on
<OK>. -
Power-cycle the camera hub with the new network configuration so all cameras adopt the new addressing system.


Troubleshooting camera synchronization
Use this section to solve advanced configuration issues that may occur in specific hardware or network setups.
Cameras stream but do not synchronize:
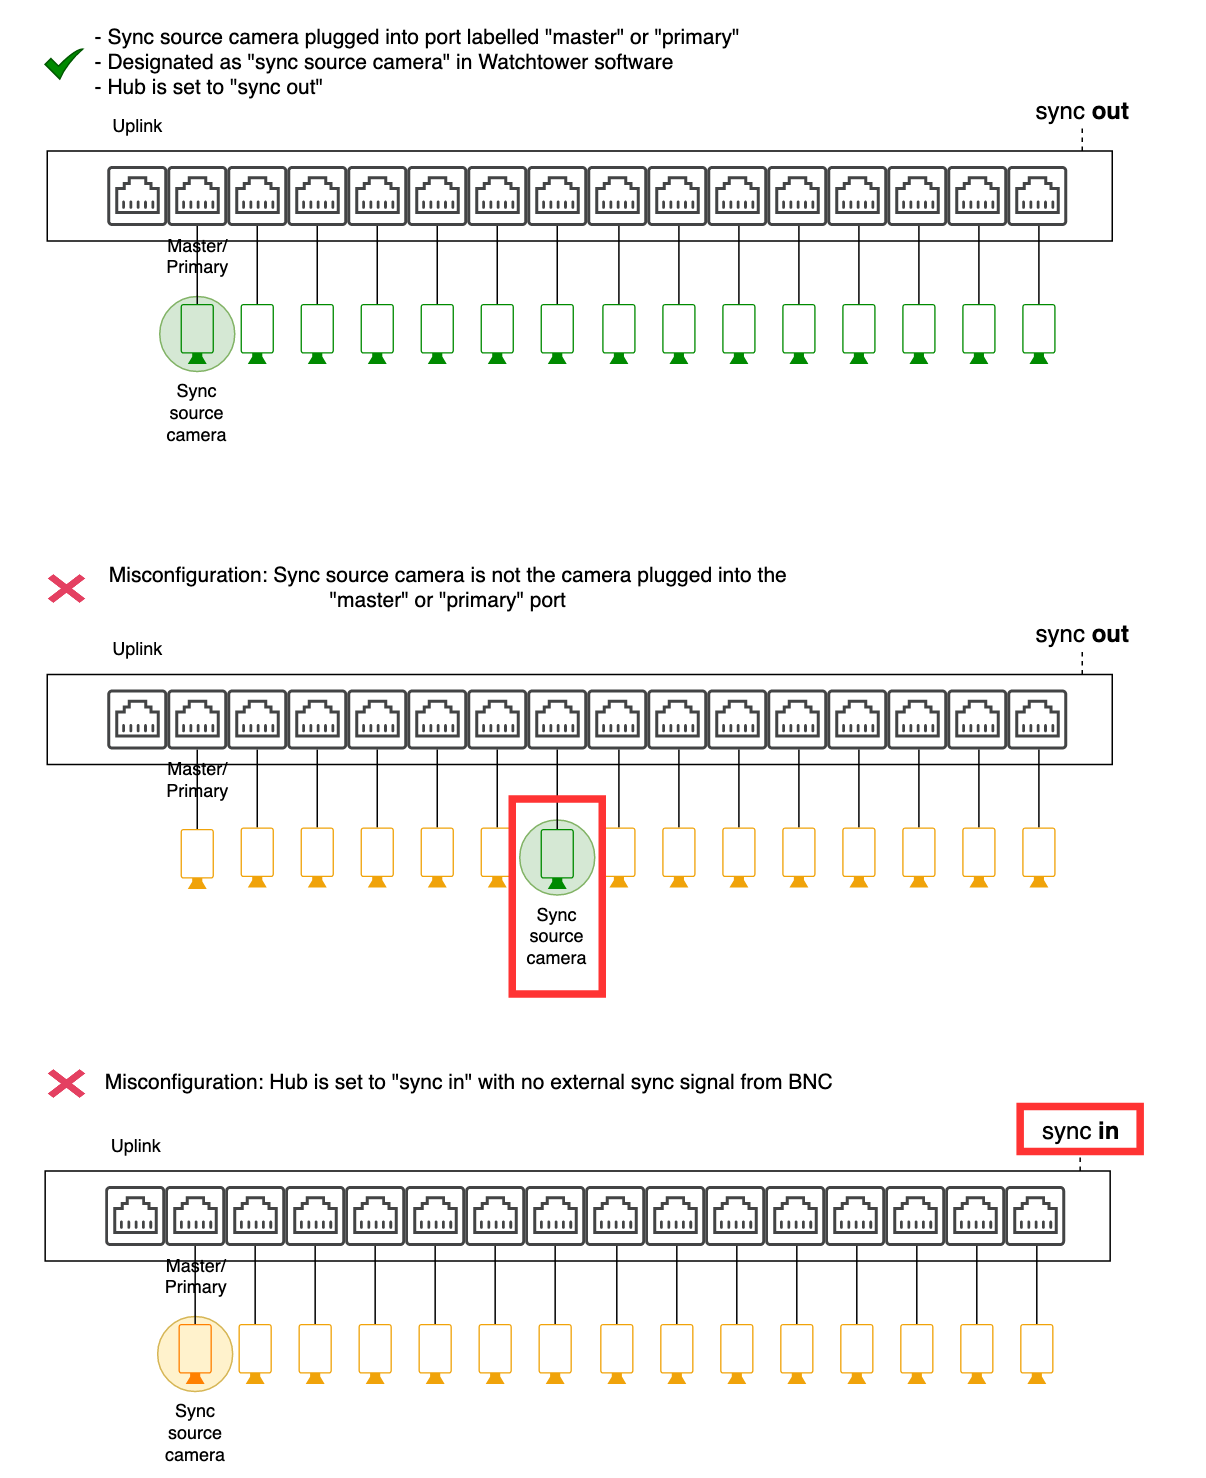
If your cameras are successfully streaming video, but all cameras (or all-but-one-camera) report that they are not receiving a synchronization signal (orange status in Watchtower Dashboard), then
- The sync source camera or hub sync switch may be incorrectly set
- The desired sync source camera was not plugged into the camera port labeled “Master” or “Primary”.
See illustration below for the most common misconfigurations and how they may present in terms of sync status.
Cameras stream but do not synchronize in “daisy-chained” multiple hubs (single sync group)
- If you are using multiple “daisy-chained” hubs and all cameras successfully stream video, but one or more hubs of cameras do not synchronize, the hub synchronization BNC connector require further configuration. Refer to the graphic below to see which synchronization selector may require toggling:
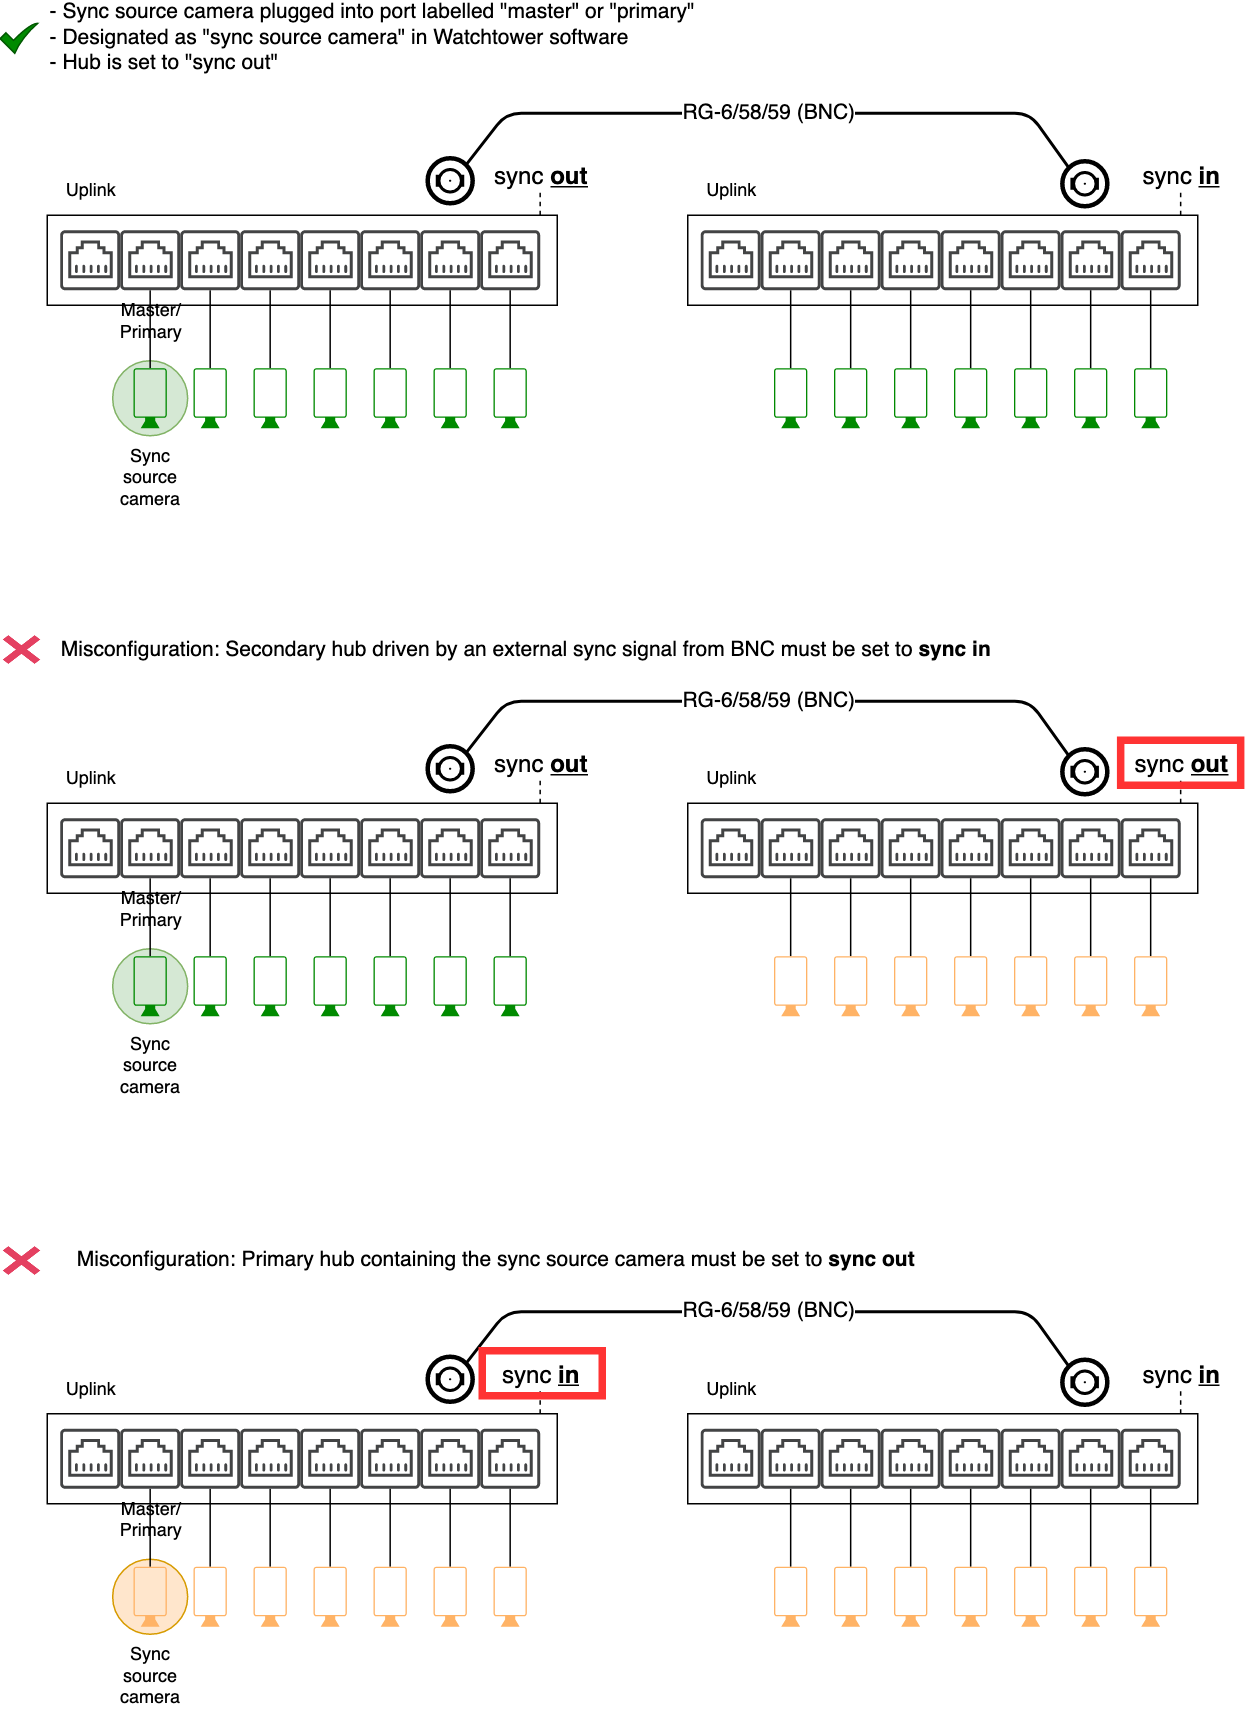
The 3 hubs are daisy-chained together into one large sync group, with the leftmost hub's sync source camera being shared among the additional 2 hubs.
See the Hardware/Hub page for more instructions on configuring the rear camera hub BNC.
Single camera does not sync
If all cameras synchronize except one, stop camera streaming for that individual camera unit, and replug it into another free camera port on the e3Vision hub.
If the same camera synchronizes on a different port hub, please contact us at info@white-matter.com for more technical support.